Digital Photoguide

 As published in the monthly magazine:

logo-railways-illustrated-red03

Home

About this site

Latest Updates

Latest Article

Book

47-Crewe

66-liner

168111-Denham

Recta

2009

2008

2007

Recta

Recta

Recta

Contact

165-snow

67-ruscombe

Part 21 - Entering the Twilight Zone - ‘Processing the Picture’

April 2006 Magazine


Part 21 is continued from Part 20. Having taken a picture of a moving train using a high ISO setting on the camera it is necessary to process it in Photoshop to deal with the noise appropriately without spoiling the detail. This article explains how to do so.

The whole picture before making any changes to the noise is shown below.
 

67-taplow-whole-image-before

The full noise reduction process removes not just the noise but also fine detail. See the ‘Before’ and ‘After’ noise removal comparison below. Although the noise is removed effectively, note particularly the loss of detail in the ballast, locomotive buffer area and the station canopy.

(NOTE: it may be necessary to hold your mouse pointer over the image for a few seconds to allow the web browser to change the picture)


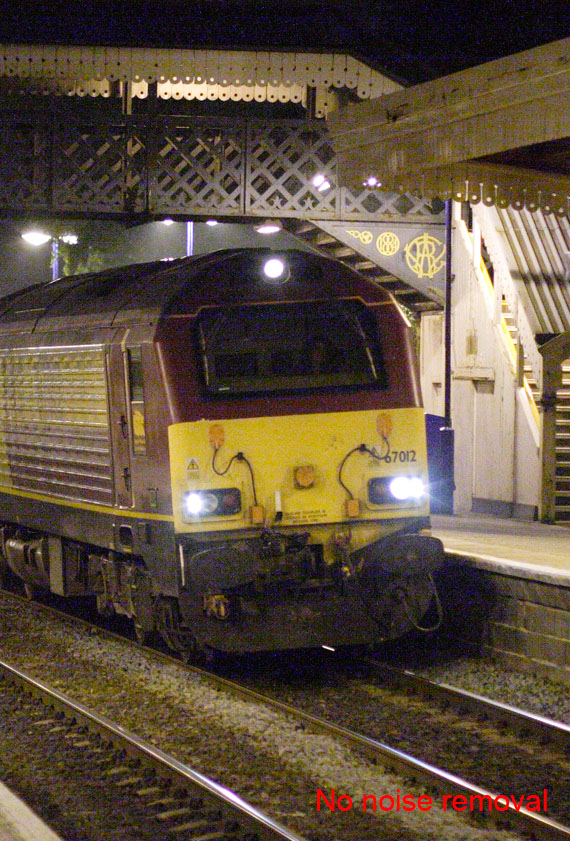
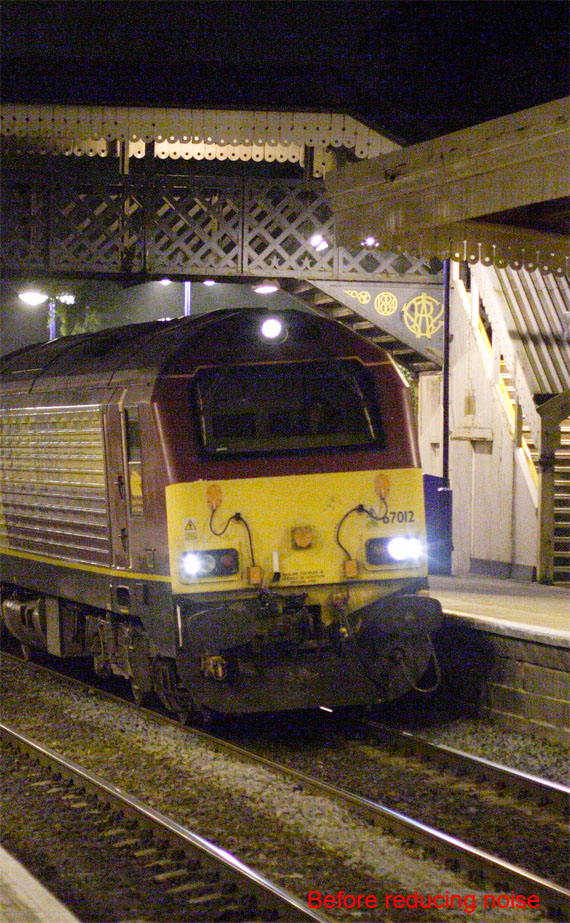
To create a successful result requires a composite approach - removing noise from the key areas where it is obtrusive but leaving the areas with fine detail untouched or lightly processed. Judge for yourself how successful the technique has been by examining the image below with its ‘before’ and ‘After’ versions. An enlargement has to be used because the differences are not visible on a small low resolution web image. Area where the noise reduction has been strongest are: the sky, locomotive cab front, buffers and lower valence.

(NOTE: it may be necessary to hold your mouse pointer over the image for a few seconds to allow the web browser to change the picture)


Part Twenty


Part Twenty Two


NIR-80-portrush Gen-tampa All material © Kim Fullbrook
2004-2011 5690-gx 201-Kildare